JavaScript: Colorbox
Dialog boxes, like these colorboxes, are pretty common. Using jQuery, as we do, it's very easy to show or hide an element that is then overlaid on the page. In most cases, however, it’s an accessibility disaster.
This page first lays out how to mitigate the accessibility issues, and then goes into detail on how you might add a colorbox to your own pages. You must use both the HTML and the JavaScript, which means you need to at least be a webmaster in your web area to code a colorbox.
Accessibility Concerns
Using jQuery, as we do, it's very easy to show or hide an element that is then overlaid on the page. In most cases, however, it’s an accessibility disaster.
(Much of the following comes from Nicholas Zakas's article on making an accessible dialog box.)
When you create a overlaid dialog, the input focus isn't handled correctly, and screen readers aren't able to tell that something is changed. However, it's not difficult to make a dialog fully accessible. You do need to understand the importance of a few lines of code.
ARIA roles
If you want screen reader users to be aware that a dialog has popped up, then you’ll need to learn about Accessible Rich Internet Applications (ARIA) roles. These "roles" add additional meaning to HTML elements allowing browsers to communicate better with screen readers. There are a large number of roles that alter the way screen readers perceive different elements on the page. When it comes to dialogs, there are two of interest: dialog and alertdialog.
In most cases, dialog is the role to use. By setting this as the value of the role attribute on an element, you are informing the browser that the purpose of the element is as a dialog box.
<div id="my-dialog" role="dialog"> <-- Your dialog code here --> </div>When an element with a role of dialog is made visible, the browser tells the screen reader that a dialog is present.
Dialogs should also have labels. You can specify a label using either the aria-label attribute to indicate the label text or the aria-labelledby attribute to indicate the ID of the element that contains the label. Here are a couple of examples:
<div id="my-dialog" role="dialog" aria-label="New Message"> <-- Your dialog code here --> </div> <div id="my-dialog" role="dialog" aria-labelledby="dialog-title"> <h3 id="dialog-title">New Message</h3> <-- Your dialog code here --> </div>In the first example, the aria-label attribute is used to specify a label that is only used by screen readers. You would want to do this when there is no visual label for the dialog. In the second example, the aria-labelledby attribute is used to specify the ID of the element containing the dialog label. Since the dialog has a visual label, it makes sense to reuse that information rather than duplicate it. Screen readers announce the dialog label when the dialog is displayed.
The role of alertdialog is a specialized type of dialog that is designed to get a user's attention. Think of this as a confirmation dialog when you try to delete something. An alertdialog has very little interactivity. It's primary purpose is to get the user’s attention so that an action is performed. Compare that to a dialog, which may be an area for the user to enter information, such as writing a new e-mail or instant message.
When an alertdialog is displayed, screen readers look for a description to read. It's recommended to use the aria-describedby element to specify which text should be read. Similar to aria-labelledby, this attribute is the ID of an element containing the content to read. If aria-describedby is omitted, then the screen reader will attempt to figure out which text represents the description and will often choose the first piece of text content in the element. Here's an example:
<div id="my-dialog" role="alertdialog" aria-describedby="dialog-desc"> <p id="dialog-desc">Are you sure you want to delete this message?</p> <-- Your dialog code here --> </div>This example uses an element to contain the description. Doing so ensures that the correct text will be read when the dialog is displayed.
Even if you omit the extra attributes and just use role for your dialogs, your page accessibility improves tremendously.
Setting focus to the dialog
The next part of creating an accessible dialog is managing focus. When a dialog is displayed, the focus should be placed inside of the dialog so users can continue to navigate with the keyboard. Exactly where inside the dialogue focus is set depends largely on the purpose of the dialogue itself. If you have a confirmation dialog with one button to continue in one button to cancel then you may want the default focus to be on the cancel button. If you have a dialog where the user is supposed to enter text, then you may want the focus to be on the text box by default. If you can’t figure out where to set focus, then a good starting point is to set focus to the element representing the dialog.
In this case, the jQuery plugin we're using, Colorbox, works well. It will handle the focus for you and allows for keyboard navigation inside the dialog. If you're using an alternate plugin, you need to ensure it's setting the proper focus.
Colorbox Examples
For all of these examples, you need to be comfortable using source view.
Text Link to Image
To see an example of a "popup" Colorbox that shows an image, click this link: See a larger image of this banner.
How-to: HTML
Go into source view and edit the wrapping link to your larger image with the following attributes: class="colorbox-link" role="dialog" like so. You might add a title, too:
<a class="colorbox-link" href="/LINK-TO-IMAGE-HERE" role="dialog" title="TITLE-OF-IMAGE-HERE">LINK-TEXT-HERE</a>How-to: JavaScript
Note that the target for the jQuery code is the same as the class you added to the link above.
<script src="/sites/all/libraries/colorbox/colorbox/jquery.colorbox-min.js"></script> <script> jQuery(document).ready(function() { // Colorbox Link jQuery('.colorbox-link').colorbox(); }); </script>Note to resize the pop-up image, include this in the JavaScript
<script src="/sites/all/libraries/colorbox/colorbox/jquery.colorbox-min.js"></script> <script> jQuery(document).ready(function() { // Colorbox Link jQuery(".colorbox-link").colorbox({width:"50%"}); }); </script>Inline Content
To see an example of a "popup" Colorbox that shows hidden content, click Basics of the New Law (content from the CFLs web area).
How-to: HTML
First, create your link, and give it a class of colorbox-inline. Point the href to the element you want to display when this link is clicked.
<a class="colorbox-inline" href="#colorbox-hidden">Basics of the New Law</a>Then create the content you want "hidden" and displayed only when the link is clicked. Wrap this content in two <div>s, like so:
<div id="hidden-content" role="dialog" aria-labelledby="dialog-title"> <div class="colorbox-hidden" id="colorbox-hidden"> <h3 id="dialog-title">New Message</h3> <-- Your dialog code here --> </div> </div>How-to: JavaScript
<script src="/sites/all/libraries/colorbox/colorbox/jquery.colorbox-min.js"></script> <script> jQuery(document).ready(function() { // Hide the inline content jQuery("#hidden-content").css({'display':'none'}); // Open inlined content in "box" jQuery(".colorbox-inline").colorbox({inline:true,width:"50%"}); }); </script>You can, of course, fiddle with the parameters for the colorbox itself, making it wider or narrower. It's best to use percentages (remember, epa.gov gets a LOT of mobile visitors), but percentages may not work well on a very small screen.
Image Gallery
Warning: these instructions require that you use a direct link to the original file. It is not a managed file, handled by the database, and links to the original file may break.
Here's how you might create an image gallery with the thumbnails linking to the full-size image.
How-to: HTML
Follow the instructions for making a gallery of images. As you upload each image, make sure you DO NOT check the box to "link to the original image." We'll handle that next.
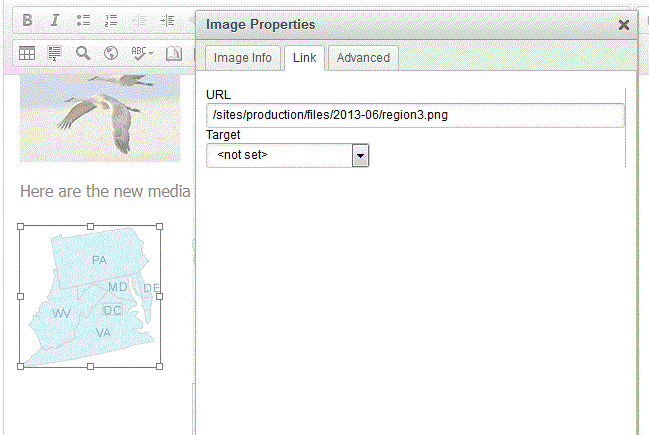
Once you've got your column of images, then right-click each image and go to Image Properties, and add a link in the Link tab. Add the root-relative link (e.g., remove the https://wcms.epa.gov/ part) to the image you want in the Colorbox: usually this image is the larger, more detailed image. Adding this link in Image Properties will wrap your image with a link to the larger image.

Next, go into source view and edit the wrapping link to your larger image with the following attributes: class="colorbox-gallery" role="dialog" like so. You might add a title, too:

Note that the img is not present while you're in code view: your image is actually a managed Media file, and all of that "funny-looking" text will be processed by Drupal WebCMS before publishing the page.
How-to: JavaScript
Note that the target for the jQuery code is the same as the class you added to the link above.
<script src="/sites/all/libraries/colorbox/colorbox/jquery.colorbox-min.js"></script> <script> jQuery(document).ready(function() { // Colorbox gallery jQuery('.colorbox-gallery').colorbox({rel:'colorbox-gallery'}); }); </script>The Blue Focus Outline
When the colorbox opens, you will notice a blue border. This is a browser default that allows those with low vision to see what they’ve just clicked on, or what is at the forefront of the window. You will also notice the blue border when clicking on a thumbnail image to open the colorbox.


YouTube Video
Here's how you might link to a YouTube video. Here's EPA's SmartWay: Anyway you ship it video.
Note that you'll want to link to the "embed" version of the video. See the image on the right for tips.

How-to: HTML
My link looks like this: <a class="colorbox-youtube" href="https://www.youtube-nocookie.com/embed/7viQ9bArQtU?rel=0" role="dialog">EPA's SmartWay: Anyway you ship it video</a>.
How-to: JavaScript
Note that the target for the jQuery code is the same as the class you added to the link above. You can also fiddle with the height and width of the video colorbox.
<script src="/sites/all/libraries/colorbox/colorbox/jquery.colorbox-min.js"></script> <script> jQuery(document).ready(function() { // Colorbox YouTube content jQuery(".colorbox-youtube").colorbox({iframe:true, innerWidth:425, innerHeight:344}); }); </script>


