
JavaScript: Timelines
Creating a Timeline in Drupal WebCMS
This timeline lets you integrate images, videos, tweets, etc. The timeline is responsive , it will display nicely on mobile devices. Examples include:
- Milestones in EPA and Environmental History
- TimelineJS (note that this version is no longer in development)
However, the timeline is not 508-compliant, as far as we know, so you should develop a text equivalent. The first example above has done it in a nifty way -- click on the "View a list of milestones" button above the timeline. But you don't have to be that fancy; you can just link to a page with a list of milestones on it.
If you have any questions about the JSON code, look at the model.
Step 1. Plan your timeline
What text will you use? Will each entry have an image? Will any entries have videos? What files will you use? Will you include links? Write out each item in a separate document. Your entries will display most consistently if the text for each item is roughly the same length, and if the images are roughly the same size.
Step 2. Upload into Drupal WebCMS
Upload all images other media files that you will incorporate into your timeline. Remember, you can link to YouTube and other videos.
Step 3. Create JSON file
Using Notepad or another plain text editor, create timeline events in JSON format.
Suggestion: Create the intro code, then ONE or maybe two entries, then the code for the last entry. Next, upload and see if it all works before you add more entries. Note that commas are very important! Pay attention to them.
Step 3A: The introductory bit
The code below is the introduction to your timeline: it is what the reader sees when they first load the timeline.
{ "timeline": { "headline":"The Main Timeline Headline Goes here", "type":"default", "text":"<p>Intro body text goes here. Including HTML is OK.</p>", "asset": { "media":"link to your image or other media file goes here; you can link to a YouTube video", "credit":"if you want to give a photo or other media credit, it goes here", "caption":"if you have a caption for your photo or other media, it goes here" }, "date": [Step 3B: The bits for each entry
Then for each entry, you will need to add the code below.
{ "startDate":"2011,12,10", "endDate":"2011,12,11", "headline":"Headline Goes Here", "text":"<p>Body text goes here. Including HTML is OK.</p>", "tag":"This is optional", "classname":"optional unique class name can be added here", "asset": { "media":"link to your image or other media file goes here; you can link to a YouTube video", "thumbnail":"link to the thumbnail version of the image", "credit":" if you want to give a photo or other media credit, it goes here", "caption":" if you have a caption for your photo or other media, it goes here" } },Note that the date format is YYYY,MM,DD (it can be YYYY,MM if you don't have a day). The end date is optional. If you don't want an end date, or any other feature (e.g., credit, caption, media), just don't put anything between the quotes. For example, if you don't want to put an image in the entry, change:
"media":"link to your image or other media file goes here"
to
"media":""
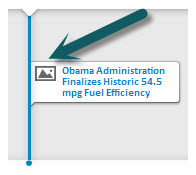
If you look at the code above, you'll also see a reference to a thumbnail version of the image. In the example at right, we actually did not create a thumbnail, because it’s so awfully small that it would be difficult to see what the thumbnail image is. So instead you see a placeholder that indicates that this entry has an image associated with it.
- If you do want to use a thumbnail, it should be 32x32 pixels.
- If you don't want to use a thumbnail, change
"thumbnail":"link to the thumbnail version of the image"
to
"thumbnail":""
- If you link to a file you've uploaded to the Drupal WebCMS, then use a root-relative link, like so: /sites/production/files/blah-blah-blah.jpg. The domain is not needed.
Step 3C: The bit for the last entry
See the comma in the last line of the code in Step 3B? Yes, the comma right after that curly bracket. That comma must not appear in the last entry! Plus, the last entry has more brackets at the end. It should be in the format shown below.
{ "startDate":"2011,12,10", "endDate":"2011,12,11", "headline":"Headline Goes Here", "text":"<p>Body text goes here. Including HTML links is OK.</p>", "tag":"This is optional", "classname":"optional unique class name can be added here", "asset": { "media":"link to your image or other media file goes here; you can link to a YouTube video", "thumbnail":"link to the thumbnail version of the asset", "credit":" if you want to give a photo or other media credit, it goes here", "caption":" if you have a caption for your photo or other media, it goes here" } } ] } }Step 4. Save file with .json extension and upload to Drupal WebCMS
For example, for the timeline shown on Milestones in EPA and Environmental History, the file can be found at https://www.epa.gov/sites/production/files/2013-06/epa_history_timeline.json. You can, if you like, use this file as a starting point for your own timeline.
Step 5. Add the HTML
Create a div and place it where you would like the timeline to appear on your page. In Drupal WebCMS, disable rich text in the body of the code and add this line of code wherever you want the timeline to appear: <div><div id="timeline-embed"> </div></div>.
If your content is already wrapped in a separate div, such as those used for tabs, use this code: <div id="timeline-embed"> </div> .
Step 6: Add the JavaScript
In Drupal WebCMS, you will see a "Page JavaScript" vertical tab on the left side of the editing page, near the bottom. Click on the tab and add the code below. Note that you'll need to change the source attribute to match the filename and location of the JSON file you've uploaded.
<script src="/sites/all/libraries/timeline/js/storyjs-embed.js"></script> <script> jQuery(document).ready(function() { jQuery('#timeline-embed').html(''); createStoryJS({ type: 'timeline', width: '100%', height: '800', source: '/sites/production/files/YYYY-MM/name_of_your_timeline_file.json', embed_id: 'timeline-embed' }); }); </script>Step 7: Adjust
Width and height can be adjusted as needed. Read this page for more timeline configuration options.
If you have errors, or your timeline doesn't show, it might be that your JSON file isn't valid. Check its validity using one of the many JSON validators, like https://jsonformatter.curiousconcept.com/.
Appendix: Complete JSON Starter
Remember, two examples can be followed:
{ "timeline": { "headline":"The Main Timeline Headline Goes here", "type":"default", "text":"<p>Intro body text goes here. Including HTML is OK.</p>", "asset": { "media":"link to your image or other media file goes here; you can link to a YouTube video", "credit":"if you want to give a photo or other media credit, it goes here", "caption":"if you have a caption for your photo or other media, it goes here" }, "date": [ { "startDate":"2011,12,10", "endDate":"2011,12,11", "headline":"Headline Goes Here", "text":"<p>Body text goes here. Including HTML is OK.</p>", "tag":"This is optional", "classname":"optional unique class name can be added here", "asset": { "media":"link to your image or other media file goes here; you can link to a YouTube video", "thumbnail":"link to the thumbnail version of the image", "credit":" if you want to give a photo or other media credit, it goes here", "caption":" if you have a caption for your photo or other media, it goes here" } }, { "startDate":"2011,12,10", "endDate":"2011,12,11", "headline":"Headline Goes Here", "text":"<p>Body text goes here. Including HTML links is OK</p>", "tag":"This is optional", "classname":"optional unique class name can be added here", "asset": { "media":"link to your image or other media file goes here; you can link to a YouTube video", "thumbnail":"link to the thumbnail version of the asset", "credit":" if you want to give a photo or other media credit, it goes here", "caption":" if you have a caption for your photo or other media, it goes here" } } ] } }